Onboarding Wizard
The Onboarding Wizard
Setting up a new WooCommerce theme normally means hours of work: creating pages manually, wiring navigation menus, configuring WooCommerce settings, and navigating a maze of Customizer panels. Yaxii COD replaces all of that with a single guided wizard. In one flow, you set your logo, pick your brand color, and enter your marketing pixels — then the wizard automatically creates your store pages, builds your navigation menus, and connects everything together. No page builder. No demo content. No cleanup.
When the Wizard Appears
The Onboarding Wizard launches automatically after your license is activated. If you closed it by accident, you can reopen it at any time from Yaxii COD > Settings by clicking the Launch Wizard button in the header.

Walking Through the Wizard
- 1Welcome ScreenThe wizard opens with a welcome screen confirming your license is active. Click Get Started to begin. [Screenshot: Wizard welcome screen showing the Get Started button and the Yaxii COD logo]
- 2Set Your LogoChoose between a Text Logo (your store name displayed as styled text) or an Image Logo (upload a PNG or SVG from your Media Library). You can set separate images for desktop and mobile. Click Next when done. [Screenshot: Logo step showing the Text/Image toggle and the upload button]
- 3Choose Your Brand ColorPick the primary color for your storefront — buttons, links, and highlights will all use this color. Click the color swatch to open the color picker and choose your brand color. Click Next. [Screenshot: Color picker step with a color swatch and hex input field]
- 4Add Your Marketing PixelsEnter your tracking pixel IDs for any platforms you use: Facebook, TikTok, Snapchat, or Google Analytics. You can leave fields empty and add them later from the Settings panel. Click Next. [Screenshot: Marketing pixels step showing four labeled input fields]
- 5Automatic Store SetupClick Apply & Finish. The wizard automatically creates your required store pages (Home, Shop, Contact, Order Tracking), builds your Main Navigation and Legal Navigation menus, and assigns them to the correct header and footer locations. This takes a few seconds. [Screenshot: Progress screen showing pages being created]
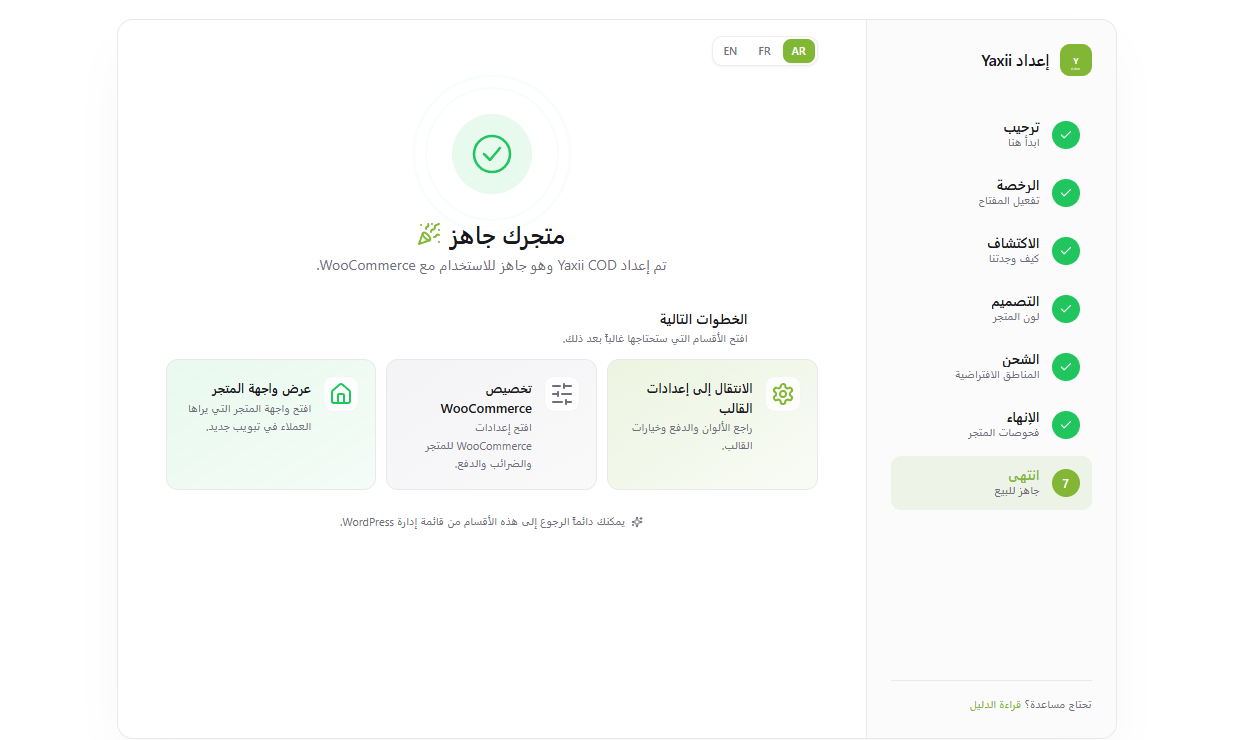
- 6Your Store Is ReadyWhen setup is complete, a confirmation screen appears. Click Go to My Store to preview your storefront, or Open Settings to continue customizing colors, typography, and layout. [Screenshot: Completion screen with “Go to My Store” and “Open Settings” buttons]
What the Wizard Creates Automatically
When you click Apply & Finish, the wizard performs the following actions for you automatically:
- Creates the Home, Shop, Contact, and Order Tracking pages
- Builds a Main Navigation menu with links to all four pages
- Builds a Legal Navigation menu for the footer
- Assigns both menus to the correct header and footer locations
- Saves your logo, brand color, and pixel IDs to the Settings panel
Re-Running or Skipping the Wizard
If you click Skip on the welcome screen, the wizard is dismissed. Your store will still load with the default settings. You can configure everything manually from Yaxii COD > Settings. The store pages and menus will also be created automatically the first time any visitor loads your storefront.
What’s Next?
Your store is set up. Next, fine-tune your brand identity — colors, typography, header layout, and footer — from the centralized Settings panel.