Category Row
Configuring the Category Row
The Category Row is a horizontal scrolling band of category thumbnails sitting near the top of the homepage. It is the fastest way a customer can navigate to the product family they are interested in — instead of scrolling through hundreds of products, they tap a category and land directly on the filtered catalog. For COD stores with even five or six categories, this single section reduces bounce rate noticeably on mobile.
Opening the Category Row section
Go to Yaxii COD > Settings > Homepage Layout. Find the Category Row card in the section list and click it to expand it. If you do not see a Category Row card, click Add Section at the bottom of the list and choose Category Row.
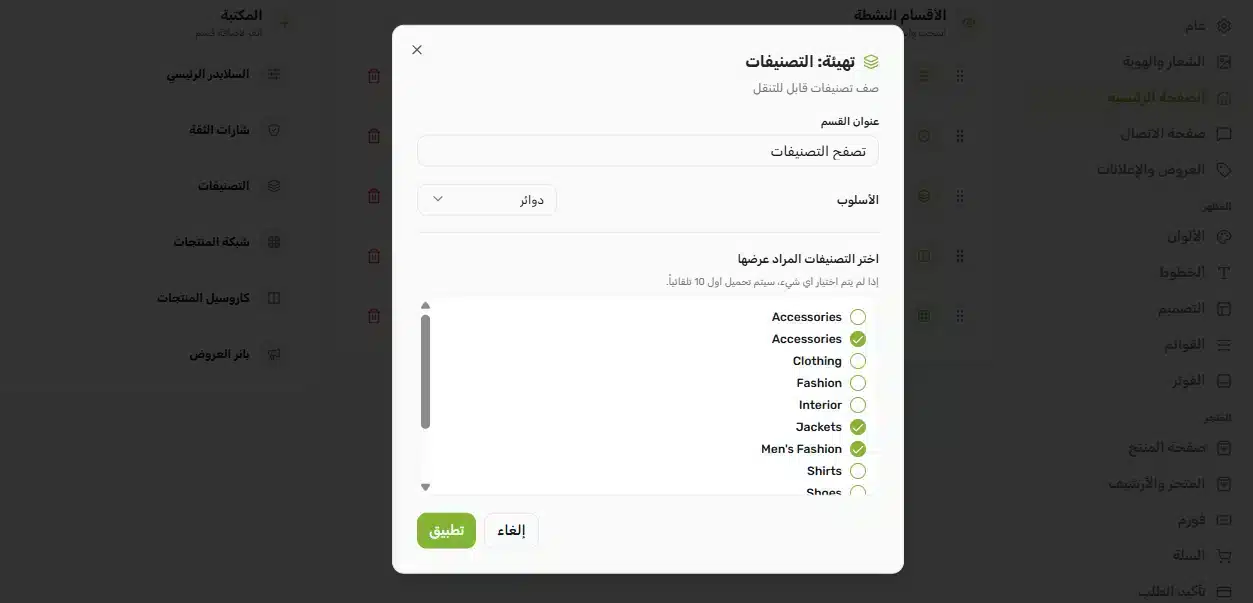
Configurable fields
| Field | What it controls |
|---|---|
| Title | The heading shown above the row (for example, “Browse Categories” or “Shop by Family”). Leave empty for a heading-less row. |
| Category style | Choose between Circles (round category icons — softer, more modern look) and Squares (rounded squares — gives more space for category artwork). |
| Selected categories | A multi-select dropdown listing all your WooCommerce product categories. Pick the specific ones you want shown in the row, in the order you choose. Leave empty to show the first 10 categories automatically. |
Adding categories
- 1Open the Category Row sectionIn the Homepage Layout panel, click the Category Row card to expand it.
- 2Set a titleType a heading for the row, or leave it empty if you want a row without a label.
- 3Pick a styleChoose Circles or Squares depending on your brand aesthetic. Circles read as friendlier and more lifestyle-oriented; Squares feel more formal and product-focused.
- 4Select your categoriesClick the categories dropdown and pick the categories you want featured. You can pick as few or as many as you want — the row scrolls horizontally on mobile so it never overflows the layout.
- 5Save SettingsClick Save Settings. The new row appears on your homepage immediately.
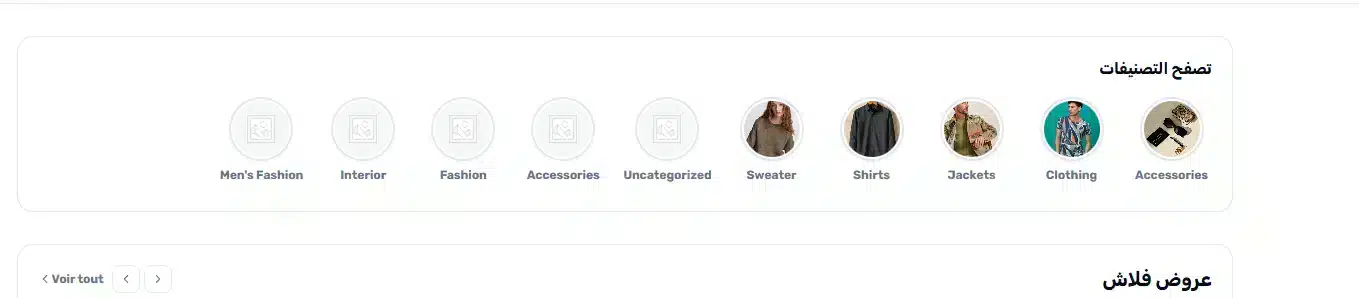
How category thumbnails are chosen
Each thumbnail is the category image you set in WooCommerce. To change the image for a specific category, go to Products > Categories, click Edit on the category, and upload a thumbnail. If a category does not have an image, the WooCommerce placeholder image is used instead — set a real thumbnail for every category you feature in this row so your homepage looks polished.
What’s Next?
Categories give customers a way to browse. The next section — the Product Carousel — gives them a reason to start shopping by surfacing your best-sellers and on-sale items right on the homepage.